Who Says You Have To Stay Inside For School Work?

Yesterday I took advantage of the sun and went outside for some art time. One can not let the creativity flow in a boring classroom 🙂

The kids had a blast finger painting and using real flowers

on the playground as inspiration for their:

“Flower Gardens”

art pic3art pic2artpic1art pic4

Warning: For preschoolers it is best to get washable paints….less ruined clothes= less frustrated parents 😉

Also please make sure it is non toxic…safety first when kiddos are in question.

Water Play Time

The weather is picking up…YAY!!!!! So yesterday we had a great time with a kitchen themed water play outside.

There is nothing more fun for toddlers or kids under 6 than a huge bowl of water and toys to get soapy wet 🙂

For this activity you will need any type of container that will hold about 4 cups of water, a few drops of dish soap, any toys that will hold up well to water, and sponges or washcloths if they want to really clean the toys.

Note: This is a supervised activity due to water being involved

IMG_3652water play picIMG_3647

Update on July “Fun in the Sun” Activities

Since my last post the weather has been less than cooperating with our summer activities 😦

Next week should start to look better and we will post as many activities as possible before we say goodbye to our summer preschool program. We did manage to squeeze in a “Splash Day” before the weather became my worst enemy this year………

IMG_3089 IMG_3100

IMG_3134IMG_3104

This is probably the day I look forward to the most in the summer 🙂

Upcoming “July Fun” Activities

Hello,

It has been awhile since I have done a post and first let me say I am sorry for that; I have been so busy with upcoming summer preschool program and the start of my vacation soon that I have just not had enough hours in a day. I did want to post today and let everyone know that starting in July I will be posting our preschool ‘fun in the sun’ activities everyday. For the crafts there will be tutorials on how to make them and links for any templates that I might use 🙂

Also I will be starting a reading corner on this site for anyone who would love for their children or preschoolers to hear safe readalongs. I used to have my preschoolers follow along with readalongs on youtube for a fun switch when they had grown tired of me reading to them 😉 I found this way to be not so reliable at times due to some videos being more for adults but geared towards childrens books. So with that in mind, I decided to make my own videos for children’s storytime in hopes that they will be fun to hear and engage children. This will start in July as well 🙂

So many exciting changes are taking shape and I look forward to sharing each one of them with you.

Have a wonderful week and a safe/fun summer 🙂

3 Easy Steps For Playdough Making At Home

Another week (almost) down means another planning week for me inside the classroom and like most preschool teachers I want my children to learn with as much hands on as I can make happen;) What does this mean while doing my lesson plan? Well I research and research some more until my eyes cross over or I just cannot fathom researching anymore. During my research adventure today, I found a great playdough recipe on facebook and thought I would pass it along for anyone else either at home moms or busy preschool teachers that might need a good easy to do recipe……..

Enjoy;)

1238128_10154076624245022_4992815072525871530_n

Recipe:

How To Make The Best Playdough: Pour 2 cups of flour into a bowl. Add 1/2 cup of salt. Mix in 2 tbsp Cream of Tartar. (You can find this in the spice section of just about any grocery store.) Add 2 tbsp of oil…you can use any oil, and as long as it’s a kitchen oil, your playdough will be non-toxic and safe for little ones to eat.

Pour in the boiling water. Be VERY careful because the dough will be HOT!

Mix all the ingredients together until the dough is formed. At this point the playdough is done unless you want to add food coloring…if you would like to add the food coloring for color then please read on…. A side note when adding the food coloring keep in mind that it can be messy so I would suggest wearing gloves for that part.

After the dough is cooled down separate the dough into equal parts and roll it up into balls. This will allow for more colors of playdough to be made instead of just one color for play. Now, push your finger into the middle of the playdough ball allowing your finger impression to make a little bowl for you to pour your gel food dye into. Knead the dough until the dye is thoroughly mixed. 

Teacher Tip:

Always make the playdough the night before so the color will set into the playdough mixture and also so dough can cool off without being rushed for activity time. And above all…Have fun with your little explorers:)

Spending a Fortune in Teaching Materials… Why???

In my life I have not always had a good stable income stream coming through my door, in fact most days were spent wondering how we would get bread or gas money. During those hard times I had to get creative for my kids because sadly preschool was not in the budget for my little family. At the time I had no idea that those struggles and “thinking outside of the box” would help me in my preschool career. Now being a preschool teacher money is still tight but no where near what it was 10 years ago, making my budget stretch now is a lot easier with some tips I picked up along the way…….

DO NOT SPEND A FORTUNE IN SCANDALOUS TEACHING AIDS!!!!

The above statement is my warning for all new preschool teachers or stay at home moms. The kids do not care how extravagant a lesson is, they only remember the lesson itself. So learn how your child(ren) learn best and incorporate anything around your house or the closest dollar store. This year my preschoolers learn best through movement so I use a lot of games to bring that connection between the activity and the child(ren). Here are my two favorite games and GUESS WHAT??? I only spent one dollar for them (which I will explain at the end of my examples).

Count the Sticker Game:

This game does not have the best name and really I do not rock when it comes to naming a game but they are pretty fun regardless of the name factor;) This week I used 8 stickers with small cards each displaying numbers 1-8. Note: the teacher will decide how many stickers to put down and what numbers to lay down as well then ask the child how many stickers there are and find the right number. I started with laying down 4 stickers and underneath the stickers put numbers 4,2,7 down, then I asked the child to count the stickers and find the number 4. If child has some problems finding the number I always point to the number and allow child to hand it to me. This also helps the child to not feel so stressed if they ever struggle with finding the correct number. Remember— you (as an adult) experience stress over new challenges and kids are no different….

IMG_1274 IMG_1275

Roll That Dice Game:

This game’s objective is counting in groups and if you are talking about numbers 1-5 then this game is a must have on your lesson plan. Each child will take a turn rolling the dice, whatever side it ends up on the teacher will ask the child to count each dot, after child has counted each dot then the teacher will ask “How many dots are there?” and give the child time to reinforce the number to the pattern of dots they see.

IMG_1277

The only thing I purchased for these games was the dice that I purchased at the dollar store a few weeks ago, the white cards I had in my classroom (but if you need them they also can be purchased at the dollar store) and the stickers were donated by a parent sometime ago. Feel free to change the stickers to anything you have in your home.. at times I used cotton balls, spoons, and sometimes crayons. Also with crayons you can incorporate the colors in the same lesson. For preschoolers killing two birds with one stone is a great time saver…..meaning if I can do two lessons at once and have more time preparing for something else then it is a great day in my classroom.

I hope this helps others who struggle with the everyday challenge of no money for teaching aids. Have a wonderful day and thanks for stopping by my preschool blog;)

A Journal of Self Expression for Preschoolers

This entry was inspired by my own need to want to clear my head by any means necessary, which happened to be in the form of an art journal. I had never done one before now but after accidentally coming across one on Pinterest, I couldn’t help but wonder if this could be a way for my preschoolers to start a journal without worrying about who can write. All preschoolers can draw or at least scribble with crayons, paints, and markers making an art journal something of a treasure for years to come. I have been looking for a way to have my little preschoolers express themselves with a theme instead of just random dots or shapes. I wanted them to hear my question and answer in their own way. Art journals have been key to that form of self expression for my students. Teachers please hear me when I say you do not have to spend a fortune for this to take place in your classroom. I took 1 piece of construction paper with 4 pieces of plain white paper. Folded both the construction paper and white paper in half then cut down the seam. Put white paper in between construction paper, stapled together, and VIOLA……. an art journal was born:)

IMG_1171

Please note that I am not the world’s best artist but the front can be whatever you would like…….

I explained to the children about what art journals are and how people use them. I also showed them my first art page so they could get the idea of what this little book could be about. Each week (I like to do them on Fridays) I give the children a theme and allow their imaginations to go wild. This week was HAPPINESS (what makes each child happy)…….

IMG_1153 IMG_1152 IMG_1151 IMG_1150 IMG_1149IMG_1184

While the kids were working I asked them about their journal page… one preschooler told me that rain/ puddles made him happy while another student drew a sun because the rays of sun made her happy. I did not make them share their journals with the class because even the best artists liked their privacy. A very fun way to help those little ones become creative and accomplish self-expression.

Note: I will be sharing my art journal pages on my health blog www.aprilsgettingfit.wordpress.com if you are interested in seeing what example I had shown my class.

Do You Have The Alphabet Blues???

Does teaching the alphabet got you suffering from alphabet blues? You thought it would be easier to teach letters/sounds to preschoolers. This was one problem I had early on when I first began to teach preschool. I quickly realized that most children learn better through repetition and movements, so after opening up my own preschool I started researching the teaching options I now had available to me. I debated whether to have alphabet flashcards or to hang them in my classroom. Sticking to my thought of movement when hunting for the teaching aids I needed; I quickly found a wonderful website called www.prekinders.com and fell in love with their alphabet flashcards. Not only were they realistic but also had easy movements (that could be used in a circle time) to go along with them.

Letter with pic card example of picture with sound:action

Flashcard Warning: There was a lot of cutting and pasting that went along with this activity……..

I cut out each alphabet card and action then glued them to card stock (which is very sturdy in case you do not have access to a laminating machine) then I laminated each card for extra durability. At circle time I presented first the alphabet letter and picture then I showed the action of that letter. The kids loved the movement which in turn caused them to pay attention for the next card. (you can find these free printables at http://www.prekinders.com/teaching-the-alphabet-part-1/ courtesy of prekinders.com)

*****Help My Child Does Not Get That Each Letter Has A Sound*****

If the above statement is what you have begun to notice then it is ok and most children have this problem, I will tell you how to start linking the alphabet letter to their proper sound. This also helps when you introduce reading to the child because it will be easier for them to grasp sounding out the word. I teach letter sounds right along with the alphabet to incorporate this mindset early on in the beginning of my school year. As I mentioned before, preschool children learn better with movements, so games is an extremely good way for each child to participate and move around without causing disruption in your circle time. I found some BINGO camping flashcards that had the word for each picture on them. A great tool to use when linking letter to sound!!! I also wrote what the first letter of each picture started with on paper and cut them into small squares. I ask the children to look at the first picture on the paper. I tell them that the picture is a mushroom, what does the letter m say. Some kids will say “mmmm” but if no reply I tell them that “m says mmmmm” showing them how my lips look while saying the sound. Then I ask them to find the letter m on the little squares of paper I have given them. Some will ask what m looks like, this is where those wonderful words come in handy on those bingo papers, so I ask them to look at the mushroom and I point to the m. I love those bingo cards;)

bingo card letters with sounds

Unfortunately I do not remember where I printed these off but found the same ones at www.nwf.org also free to print off. Here is the quick link to the BINGO cards http://www.nwf.org/kids/family-fun/outdoor-activities/camping-bingo.aspx

Also if you are looking for some more free printables check out http://kidsactivitiesblog.com/56045/free-printable-flashcards they have 12 sets of different flashcard printables that I fell in love with…..

I hope this has helped anyone struggling with the alphabet blues:) If you have a wonderful circle time method or game please let me know by commenting below.

A little this, A little that……

Welcome to the first of many blog posts that I will be writing about preschool, my travels as a preschool teacher, and weekend photography. I wish I could say that my travels would include Egypt, Brazil, or heck even an exotic place like San Diego but no just the travels of my classroom and lovely, yet exquisite backyard.  Before any of that can take place let me first let you in on a little secret. I hate punctuation!!!! Or it very well could be the other way around.  But whatever the case might be this blog will ignite the flames of hatred towards me from those readers who may be English professors or wonderful people with a flair for proper grammar.  With that in mind, I hope that many of you will look past this flaw and enjoy my blog.

Month 1 of opening my own preschool—

It has been an interesting look of a dream becoming a reality. I have always wanted to have my own personal classroom space with nothing getting messed up by kids due to lack of people not fully watching things going on around them. I bet many of you know the feeling to have worked on something for a long time (a week or even a month), hang it in the class, smile, and go home for the day. Upon returning to your classroom bright and early the next day your smile hits the floor because your famous artwork has been ripped. And it doesn’t matter if it was a corner sign for rules the outrage is out for whoever is close to see.  Even though that might be comical to a lot of my fellow readers (and when I wrote this part I found myself chuckling at the comic strip imprinting on my brain) it is a disaster for my comrades in action…… my fellow teachers. So to have my own classroom—– What a dream!!!!!

A couple of weeks ago my dream became a reality when personal issues arose in my life making me take a hard look at my life. I can’t say it was an epiphany but it was pretty dang close (Oops slang word—sorry professors).

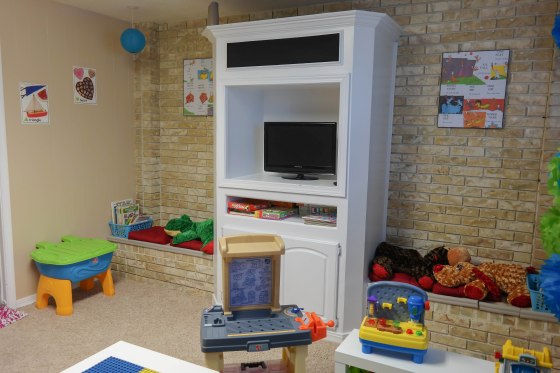
I hated what I saw and with my financial life on relaxation mode I figured today would be the day. I opened shop officially last week fulfilling my own classroom dream. The classroom is a small cozy room with an eating area off to the side. I have given up my living room and dining room for this endeavor but in time it will pay off. I have always loved teaching but now with less children and no constant brain anorism threatening to burst open from another shriek of a block crisis— I can say this is what teaching is about. To get really focused on one child and having time to reach the others before the day comes to a close is GREAT!!!! Now don’t get me wrong I still have block issues or Barbie wars to deal with but with a small class I am able to fully emerse myself into the class, making less wars among the smaller folk. Once again I am finding my love for teaching come back with a full force much like the force of Star Wars (only the good jedi force of course;) Finding my lesson plans and menus is enough to make my head spin every week but I am finding that I love this as well. My new kids are crazy, loving children with a knack for the dramatic, which helps me to stay grounded as a teacher. Let’s face it anyone who loves preschool is just a tad bit eccentric with a nice dramatic side hidden deep inside. So to have children that way allows me to focus on them pushing my diva side down.  My goal is to post weekly about my ups and downs but it might turn into monthly posts as I am finding more things to check off of my to-do list. In any case this post was about the introduction of myself and setup of my dream.

I am not sure where this blog will lead but if it achieves my dream of writing then hey it wasn’t a total lost. My only hope is that this dream of mine can continue……… knowing that I made this blog to share, grow, and help my preschool reach others. So if you like this post and can’t wait for others to come or you just want to help me spread the word out then please help my blog sight flourish.

www.beautifulmindspreschool.com